Screen recording is something very useful for those who work on the computer and need to share functions with the team. The feature gained even more notoriety after the new coronavirus pandemic forced companies to get rid of their offices, implementing the home office regime for employees. That's why many apps have appeared on the market offering the function, but what many people don't know is that Windows 10 itself has the tool to record the screen.
The feature that comes installed on Microsoft computers allows users to record the screen of any program, it is also possible to capture audio from the device's microphone, or from connected microphones. However, the tool has limited use and is not authorized to record the Windows desktop or File Explorer screen.
To record the screen of these areas there is a free website that facilitates the process and does not require the installation of any program. If you want to understand how it works, click here and see how to use it.
See more!
- Are you familiar with gesture navigation? o enable the feature on android
- how to change netflix password on mobile
- o clean and delete posts quickly on facebook
o Record Windows 10 screen:
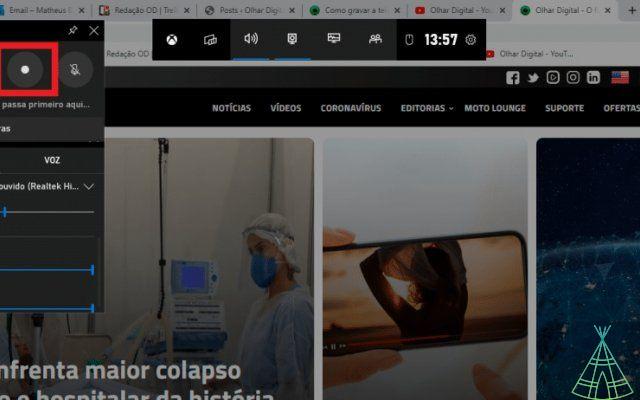
1 - When you are on the screen you want to record, press the Windows + G keys;
2 - A screen called the Game Bar will open, just click on the record icon to start the video;
3 - When applicable, the user can open the microphone, just click on the icon;
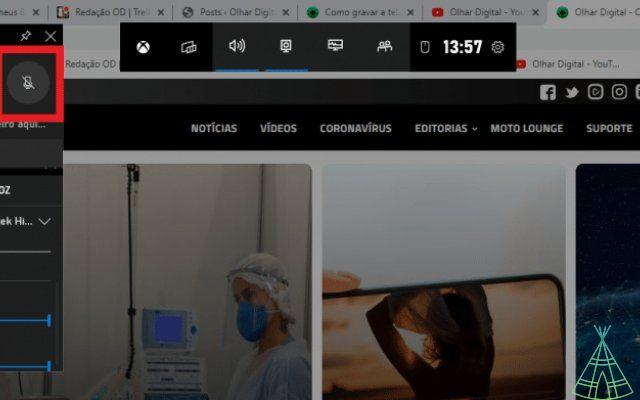
4 - To stop recording, just click on the shortcut that will be open on the screen;

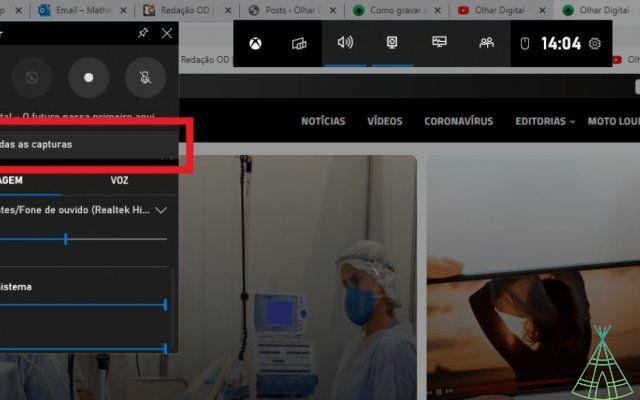
5 - The videos are saved in the Videos / Captures folder on your Local Disk C. It is also possible to access them through the Game Bar, just type Windows + G and choose the option “Saved Captures”.
Ready! Now you know how to record the Windows screen quickly and conveniently.
Have you watched our new videos on YouTube? Subscribe to our channel!