From Chapolin flying on the aerolite to Captain America fighting a horde of aliens, even passing through the weather forecast on the news, all these scenes that use special effects have one thing in one: they used a technique known as “chroma key”.
Using a green (or blue) background to insert, in post-production, another image is one of the oldest resources in cinema – it started to be used in the 1930s – but is still part of the repertoire of video editors today. Why? Because it's practical, simple and relatively inexpensive.
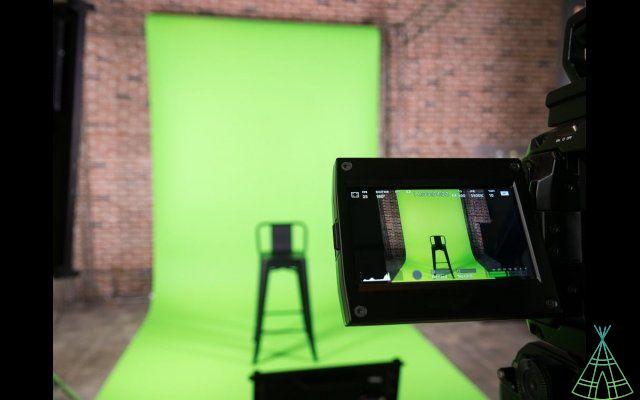
The idea is to film the scene with a monochromatic screen in the background and, later, superimpose another image or video, making the background transparent. This even explains the choice of background color: green and blue differ more clearly in hue than any human skin color, otherwise the person would be “invisible” when the effect was applied (in fact, this is how it is even done today: cover the actor or object in green and remove it in post-production).
Fortunately, the chroma key technique is much more accessible today. Anyone, a camera, a computer and a green background can, in a simple way, reproduce the effect. Many YouTube content creators, for example, use the technique to make their videos look more professional and illustrative in video lessons, or even to stream games by leaving their own image on the screen.
Perhaps the easiest “ingredient” to get to make a chroma key is the background itself. It's easy to find fabric infinity screens for sale in the most varied prices and sizes on e-commerce – it will depend on your needs. Smaller backgrounds are for videos where the person in focus is only being filmed from the waist up, while larger screens are used to capture one or more entire people.
But just the background doesn't help. Good lighting can be the difference between Chapolin and a Captain America in the final effect, so it's important to be aware of that. Soft, diffused lights on the green background help eliminate shadows, ensuring the final product looks smooth and natural.
Focused people should have their own separate lighting, also to avoid leftovers. Another important detail, which seems obvious, but if it goes unnoticed can cause a lot of problems up ahead, is that the people who will be in the video should avoid wearing green clothes. Anything green in the scene will be removed when using the chroma key.
Post-production, which at first may seem like the most complicated part, can be much simpler: just use the right software. With Movavi Video Editor Plus, you can edit a chroma key scene with just a few clicks and get impressive results. Check it step by step:
Step 1. Install Movavi Video Editor Plus
Download and install Movavi Video Editor Plus on your PC or Mac. After installation is complete, launch the program.
Step 2. Import your media files into the program
Keep in mind that in a chroma key video, you will need two elements: one to use as the background and the other as the foreground. It can be two videos or a video and a photo. The foreground should be green screen footage. Now add the files you want to combine using the chroma key technique. Click "Add Files" under the "Import" tab and select the appropriate items. Click “Open” to add the files to the program's media partition.
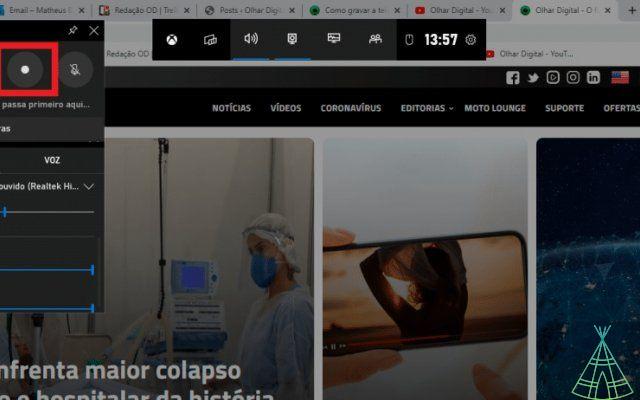
Step 3. Edit your footage using the green screen video effect
Drag the two items from the media tray onto the video track. Then select the video you are going to use as the foreground and drag it up. As you do this, an overlay track will appear.
In the “More Tools” menu on the left side, select the “Chroma Key” tab. Click anywhere on the video background in the preview screen using the color picker tool – this will make the selected color transparent. Adjust the “Tolerance”, “Noise”, “Edges” and “Opacity” parameters as desired and click “Apply”. The background will automatically change to the one you chose.
Step 4. Save the Chroma Key video
When you are satisfied with the result, click on the “Export” button. In the window that appears, enter the title, select the appropriate video format, quality and destination folder. When everything is set, click Start.
Movavi even offers slow motion effects, stylization and other filters to make your work look more professional. The Movavi Effects Store offers even more titles, transitions and other extra content designed by professional designers. You can use the trial version of the software for free for seven days, or take advantage of Movavi Unlimited, which gives you access to 11 apps including special effects, video editor, photos, screen recording and more for R$ 199,95 per year , or R$399,95 for commercial use. Learn more about Movavi's Chroma Key function by clicking here!