A wireless network card, available from the factory on notebooks and on some desktop models, allows the user to use the Internet from anywhere in the house without worrying about extra cables.
If you use Windows 10 on your machine, you can find the wireless network management settings in different ways. In this tutorial, we're going to deal specifically with four of them: using the taskbar; in the system settings; using the Control Panel, and finally, for the more advanced users, using a few lines of ando in the Ando Prompt.
or connect to a Wi-Fi network using the taskbar
1. First, click on the Network icon in the lower right corner of the taskbar. Now select which wireless network you want to connect to.
2. Then click Connect (if you don't find any wireless access points in the list, your network card may be turned off, click the 'Wi-Fi' button to activate it).
3. Confirm the network security key and click the 'Next' button to complete the request.
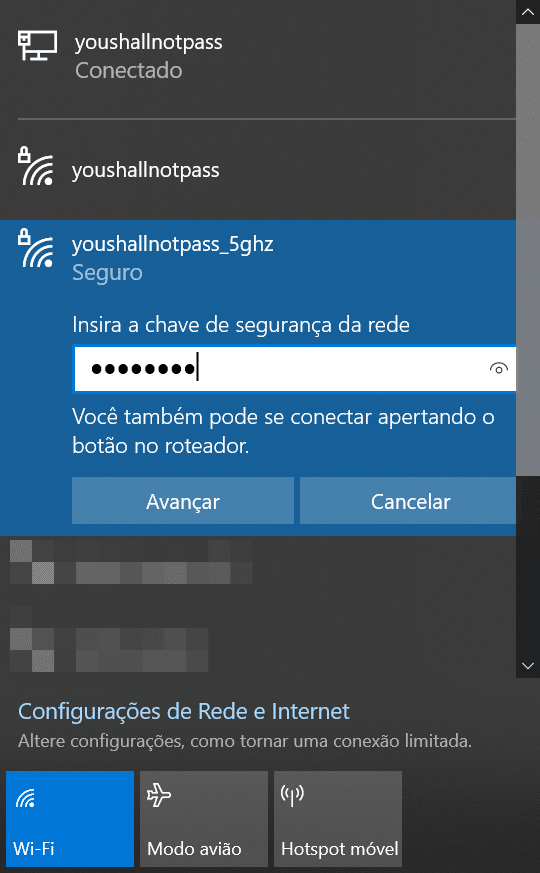
A hint: Don't forget to check the option 'Log in automatically' so that you don't have to enter the password manually every time you have to log in.
o schedule a connection to a Wi-Fi network in Windows 10
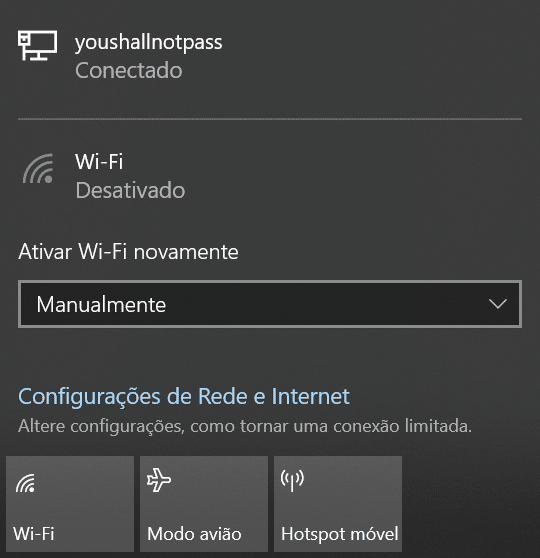
Windows 10 can also automatically reconnect a device after the user turns off their wireless network card.
To configure this functionality, click the network icon again and the 'Wi-Fi' button to temporarily turn off wireless connectivity to the puter.
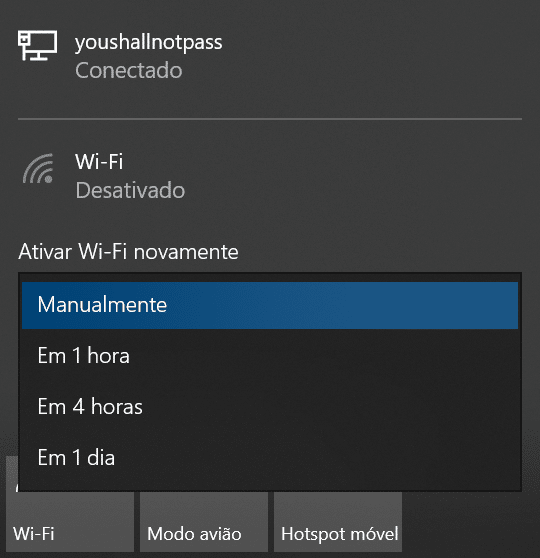
From the menu, select when you want the system to automatically reconnect. Options are: 'Manually'; 'In 1 hour'; 'In 4 hours' and 'In 1 day'.
It is worth noting that the PC will only be able to automatically connect to networks that you have previously connected to.
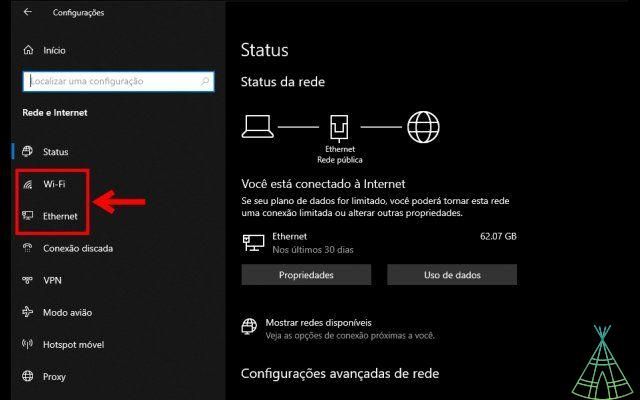
Connect to Wi-Fi network using settings menu
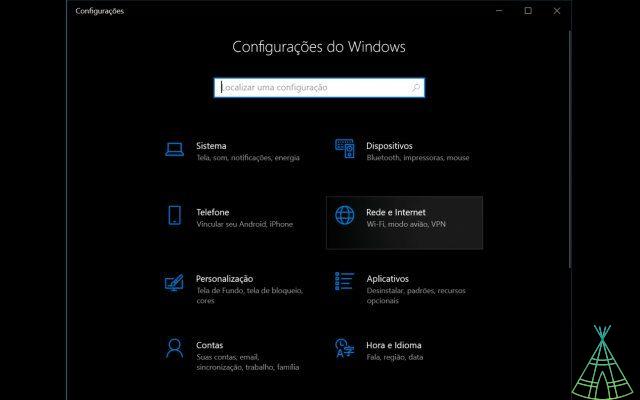
Using the 'Network and Internet' settings menu, you can also manually add wireless networks in Windows 10. To do this, follow the steps below:
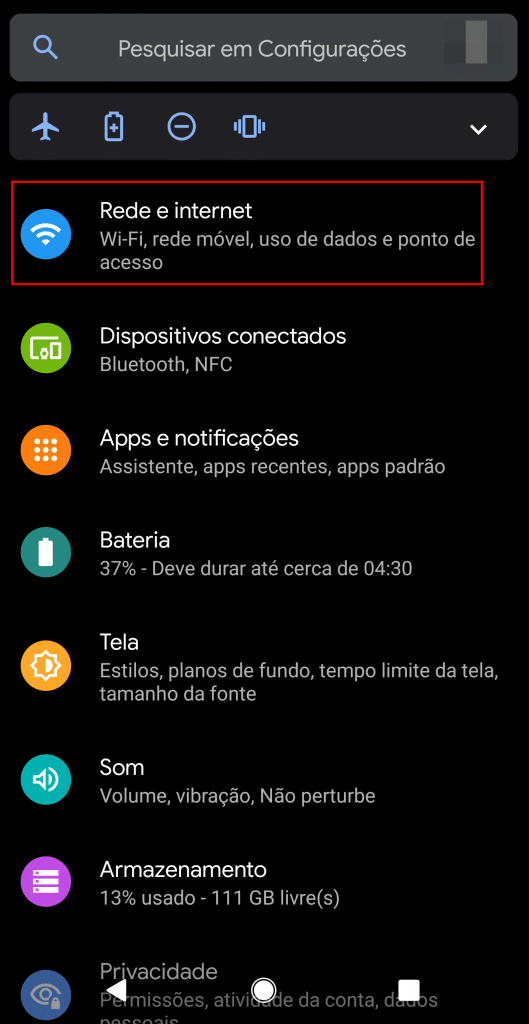
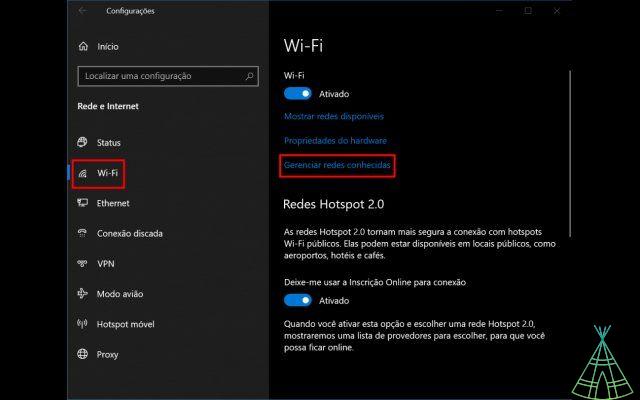
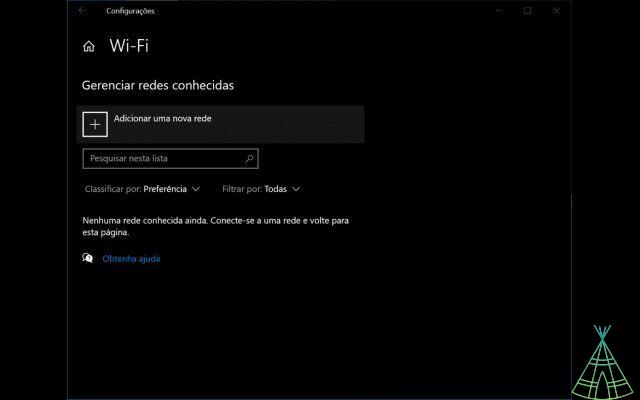
1. Open Settings (gear icon in start menu), click 'Network and Internet', 'Wi-Fi'. Then click on the 'Manage known networks' option.
2. Click the 'Add a new network' button, enter the name of your Wi-Fi network and use the drop-down menu to select which type of security to use. Usually on modern routers the default option is 'AES WPA2-Personal'.
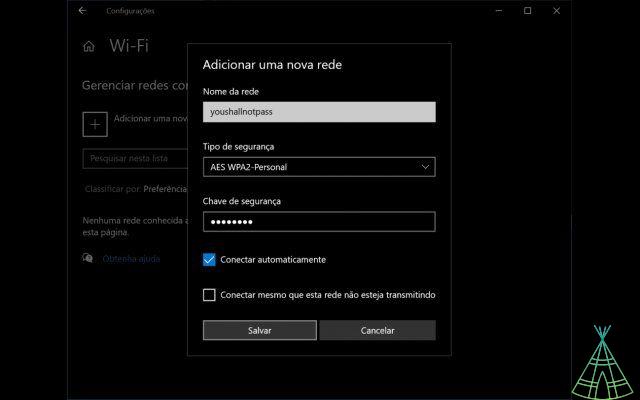
Confirm the network password and check the option 'Connect automatically'. Finish the process by clicking on the 'Save' button.
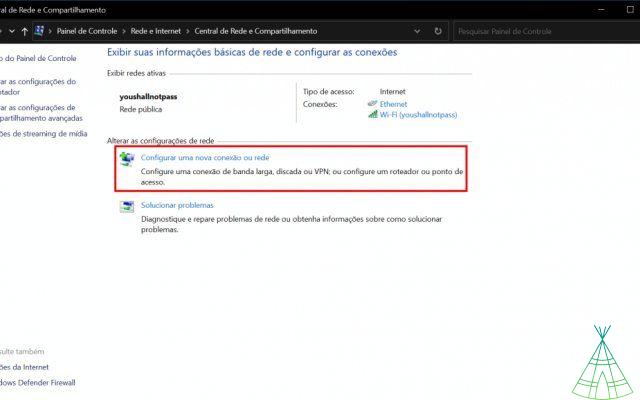
Connect to a Wi-Fi network using Control Panel
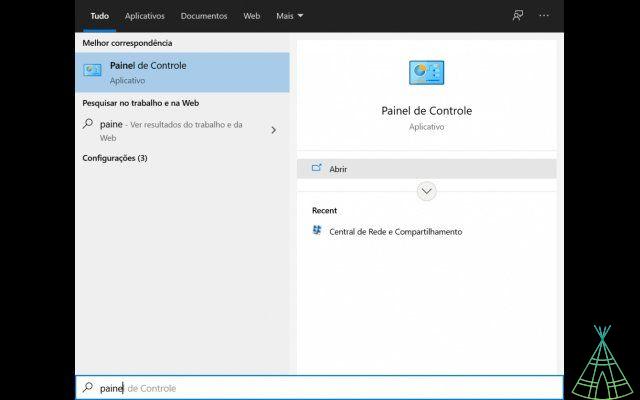
The first step is to open the Control Panel. Press the Windows key, type 'control panel' into the search bar and click 'Open'.
1. Click on 'Network and Internet', 'Network and Sharing Center' and 'Set up a new connection or network' option.
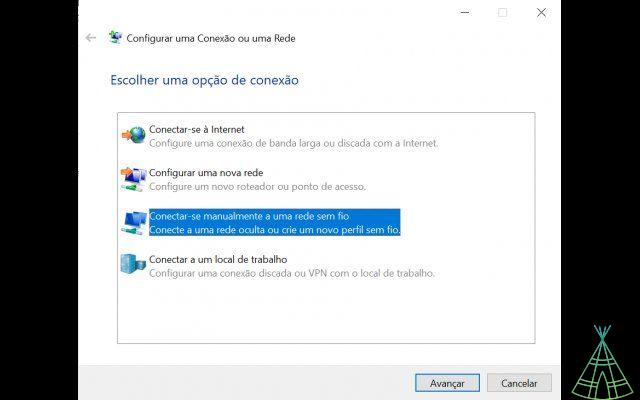
2. Select the 'Manually connect to a wireless network' option and click the 'Next' button.
3. Then fill in the name (SSID) of the network and use the menu to select the type of network security. Finally, enter the password and check the 'Start this connection automatically' option.
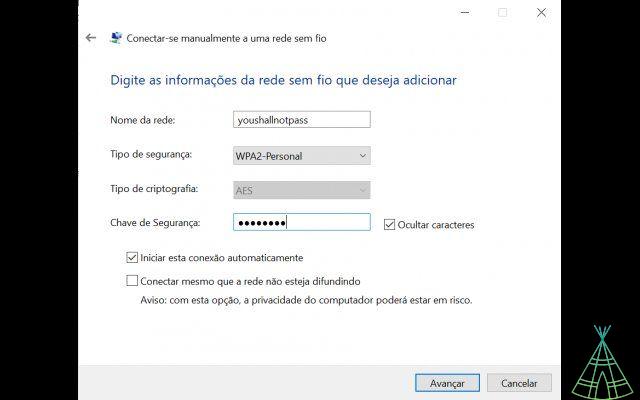
4. Click on the 'Next' button to complete the process.
Read more:
- Application shows tattoo result before procedure performance
- Which Windows am I using? Know where to see information
- iPhone feature lets you see if your passwords were leaked; see the use
Connecting to a Wi-Fi Network Using the Walk Prompt
Finally, one more alternative is to use some ando lines in Ando Prompt to reconnect to a wireless network in Windows 10.
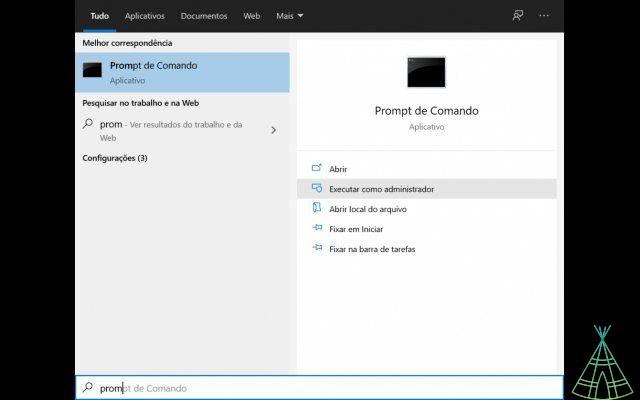
To do this, open the start menu (or use the Windows key), type ando prompt and click on the 'Run administrator' option.
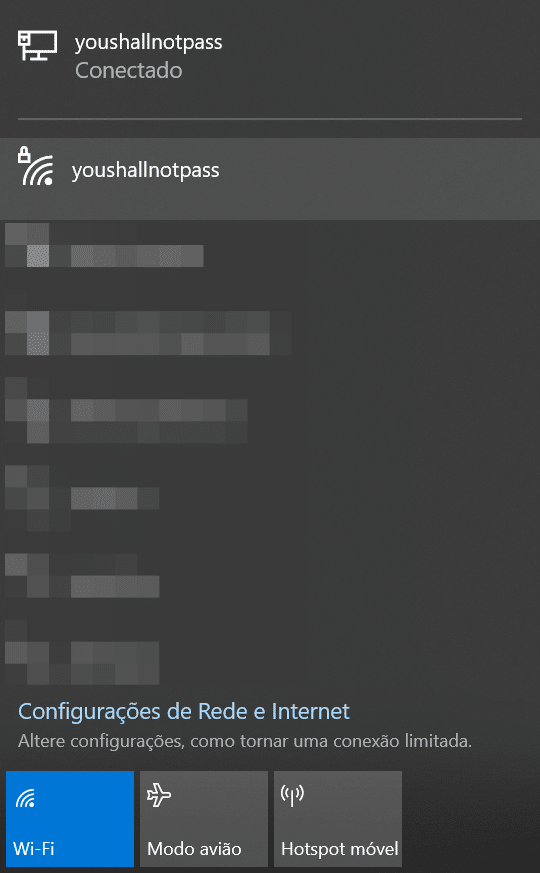
Now, type the following command (without quotes) to view the available network profiles and then press Enter: “netsh wlan show profile“
Type the second floor to reconnect to one of the available wireless networks and press Enter: “netsh wlan connect ssid=NETWORK-NAME name=NETWORK-PROFILE“
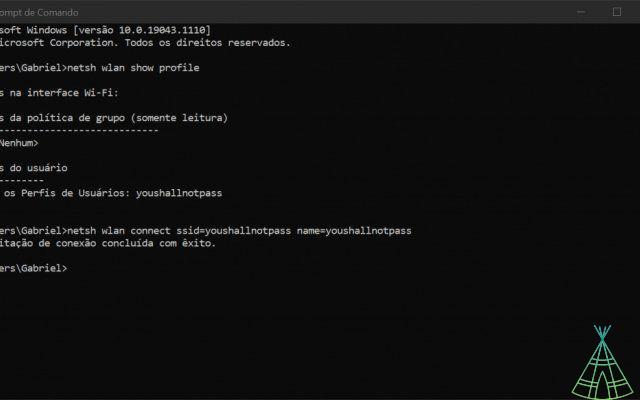
Remember to specify your network name (SSID) and profile name exactly. In the example above, the final link was: “netsh wlan connect ssid=youshallnotpass name=youshallnotpass“
After completing both steps, the prompt will confirm that your device has connected to the specified wireless network with the message “Connection request completed successfully”.
Have you watched our new videos on YouTube? Subscribe to our channel!